Category: Beauty

  • The 1/2/3 Rule for Retinol: Your Flawless Glow Guide

    The 1/2/3 Rule for Retinol: Your Flawless Glow Guide

    Stepping into the world of advanced skincare feels incredible until a dreaded chemical burn or massive peeling spell ruins your vibe. Stumbling into the bathroom looking at flaky patches makes anyone want to toss their active serums right into the trash bin.

    Thankfully, mastering the popular 1/2/3 rule for retinol saves your precious skin barrier while unlocking that gorgeous, glass-skin radiance everyone craves.

    Getting a smooth, youthful complexion does not mean you have to endure an agonizing rite of passage filled with raw redness. Think of your cellular turnover journey as a cozy wellness marathon rather than a frantic sprint toward instant anti-aging gratification.

    Easing your delicate face into this transformative vitamin A derivative prevents classic irritation while letting the active ingredients do their heavy lifting behind the scenes.

    This Magic Routine Really Matters

    Your Skin Safeguard Scheme

    Let us be real: jumping face-first into skincare actives without a game plan is a recipe for a flaky disaster. The 1/2/3 rule for retinol acts as your ultimate complexion insurance policy. 

    How to Dress More Confidently can inspire readers to feel more confident in their overall beauty routine while building a calmer, more consistent retinol habit.

    This structured method stops you from turning into a peeling tomato, protecting your precious moisture barrier while unlocking maximum aesthetic radiance. It turns a intimidating chemical into your absolute best beauty bestie.

    The Science of Gentle Calibration

    During the initial phase of any advanced anti-aging skincare regimen, your outer stratum corneum experiences a temporary thinning effect while the deeper epidermal layers thicken. This structural shift is precisely why your face can feel tight, dry, or unusually sensitive during the first month of application. 

    Sticking to a strict, measured schedule protects your delicate moisture levels while your cells gradually upgrade their natural regeneration cycle.

    Demystifying the Famous Retinol Calendar

    Demystifying the Famous Retinol Calendar

    Understanding Your Golden Cellular Frequency

    Introducing potent retinoids too quickly signals absolute chaos for your protective lipid barrier, causing immediate flaking and burning. This progressive, beginner friendly schedule stands as the ultimate blueprint designed by skincare experts to ease your tissue into rapid cellular turnover safely.

    By following a structured timeline, you effectively condition your face to tolerate the active compound without triggering systemic inflammation.

    Week One Sets the Testing Foundation

    Your journey toward glass skin begins with extreme restraint and precise application methods. During this opening phase, you will apply your chosen low percentage formula exactly one time over the course of seven full days.

    Pick a predictable evening, like a relaxed Friday night, so you can easily observe how your skin tissue responds over the peaceful weekend.

    Week Two Expands Your Skin Tolerance

    Handling the first seven days without any noticeable redness means you are officially ready to step up your application game. For the second phase, apply your pea sized amount of serum exactly twice during the week, ensuring you space these nights out meticulously.

    Excellent spacing looks like applying your product on a Monday evening and waiting until Thursday night to repeat the process.

    Week Three Finalizes the Initial Acclimation

    Reaching the third tier means your cellular structure is becoming beautifully acquainted with accelerated renewal. You will now apply the active 

    cream exactly three times this week, maintaining a strict every other night rotation strategy. Stick to a simple Monday, Wednesday, and Friday schedule, keeping your weekends entirely dedicated to deep moisture recovery and barrier support.

    Actionable Steps for Flawless Daily Application

    Actionable Steps for Flawless Daily Application

    Embracing the 1/2/3 rule requires avoiding common retinol mistakes in your real-life evening aesthetic routine requires clean execution to bypass unexpected inflammation. 

    First, double cleanse your face with an ultra gentle, non stripping milky wash to melt away daytime cosmetics and stubborn sunscreen residues.

    Carefully pat your skin dry with a clean microfiber towel and wait a full fifteen to twenty minutes because applying retinoids to damp skin accelerates absorption to a dangerous, highly irritating degree. 

    If your skin is notably sensitive or prone to dryness, implement the celebrated sandwich method by applying a thin layer of hydrating lotion before your active serum. 

    Next, squeeze a precise, pea-sized dot of product onto your fingertips and dab it evenly across your forehead, cheeks, and chin while avoiding the hyper-sensitive eye contour and outer nostril crevices. Smooth the product gently using upward motions before waiting another ten minutes to let the active formulation settle deep into your pores. 

    Finally, seal everything in with a rich, ceramide heavy nourishing cream to lock down hydration and prevent transepidermal water loss while you sleep, making sure to avoid applying harsh active ingredients like alpha-hydroxy acids, beta-hydroxy acids, or benzoyl peroxide on your designated retinoid nights. 

    Do not forget to finish your daily beauty cycle by applying a generous amount of broad spectrum sunscreen every morning to protect your freshly sensitized, renewing cells from UV damage.

    Maximizing Results Beyond the Third Week

    Maximizing Results Beyond the Third Week

    Transitioning to Long-Term Maintenance Schedules

    Completing your third week beautifully does not mean you should suddenly rush into nightly applications without checking your barrier health.

    Skin Care for Perimenopause can help readers adjust their retinol routine when hormonal changes make skin feel drier, thinner, or more sensitive.

    Continue your thrice-weekly application for an additional month to ensure your tissue has completely integrated the active molecule into its daily function.

    Once your face feels completely normal and hydrated, you can safely bump up to four times weekly or move toward an every-other-night permanent routine.

    Selecting Complementary Barrier Repair Products

    Nurturing your face on your off-nights is just as crucial as the actual nights you use your vitamin A derivatives. Invest in professional-grade formulas packed with soothing niacinamide, squalane, fatty acids, and multi-weight hyaluronic acid molecules to actively repair your lipid layers. 

    These restorative ingredients fill in the structural gaps of your skin barrier, keeping your complexion looking plump, bouncy, and deeply hydrated.

    Frequently Asked Questions

    1. What is the 1/2/3 rule for retinol?

    The 1/2/3 rule for retinol is a progressive, beginner-friendly schedule where you apply the product once a week for the first week, twice during the second week, and three times throughout the third week to safely build up skin tolerance.

    2. What do Koreans use instead of retinol?

    Korean beauty formulations heavily utilize bakuchiol, which is a plant-derived alternative that delivers identical anti-aging, collagen-boosting benefits and smooth skin texture without causing the classic dryness, irritation, or peeling associated with traditional retinoids.

    3. Is 50 too late to start retinol?

    It is never too late to start using retinoids because mature skin benefits immensely from accelerated cellular turnover, boosted collagen production, faded dark spots, and smoothed fine lines at any stage of life.

    4. What should you never mix with retinol?

    Never layer your retinoid with potent exfoliating acids like salicylic, glycolic, or lactic acids, nor direct vitamin C, because combining these strong actives simultaneously causes severe skin barrier damage and intense irritation.

    Glowing Goals Achieved Forever

    Committing to the gentle 1/2/3 rule for retinol is the absolute best gift you can provide for your long-term beauty journey. Giving your skin tissue the proper time to adjust rewards you with reduced fine lines, faded hyperpigmentation, and a stunningly smooth texture. 

    Keep your hydration levels high, protect your fresh face with daily broad-spectrum sunscreen, and watch your ultimate glowing skin goals come to life.

  • How to Fix Cakey Foundation: Easy Makeup Rescue Guide

    How to Fix Cakey Foundation: Easy Makeup Rescue Guide

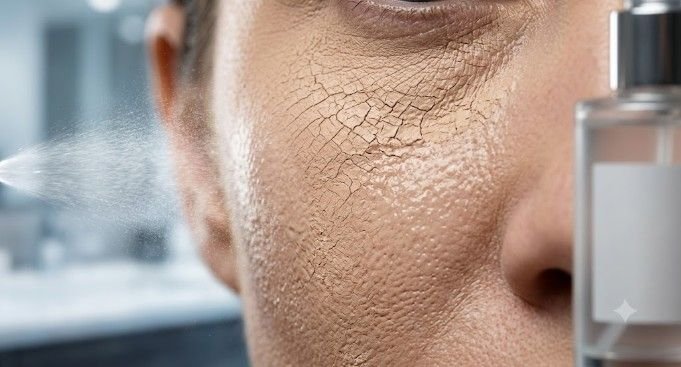
    We have all been there. You spend thirty minutes meticulously blending your makeup, take one step into the daylight, and realize your face looks like a cracked desert landscape. Instead of a smooth, airbrushed finish, your base looks heavy, patchy, and distinctly unnatural. 

    Learning how to fix cakey foundation is an essential beauty skill that saves your time, your sanity, and your favorite products from being thrown in the trash.

    The Quick Fix: How to Save Existing Makeup

    Press the Product with a Damp Sponge

    If your foundation already looks heavy or patchy, you do not need to wash your face and start over. Avoid wiping the foundation, as this will only smear the pigment and create streaks. Instead, use a bouncing or pouncing motion with a clean, damp makeup sponge to press the product directly into your skin. The gentle pressure and humidity will smooth out the excess product seamlessly.

    For better blending and to prevent lifting coverage, spritz the sponge with a hydrating setting or facial mist first. The dampness helps re-emulsify the dried cosmetics, allowing the layers to fuse together naturally. This quick physical manipulation lifts away the heavy top layer of makeup while leaving the underlying coverage intact.

    Add Targeted Moisture to Dry Zones

    Cakey makeup is usually caused by dryness or over-application of heavy matte products. To counteract this, spritz your face with a hydrating face mist or tap a tiny drop of lightweight moisturizer onto the affected areas before blending with your sponge. Focus specifically on high-movement zones like the corners of the mouth, under the eyes, and around the nostrils.

    This targeted hydration instantly revives the flexibility of your makeup base. By reintroducing moisture to dry patches, you allow the pigments to settle flat against the skin rather than clinging to dead skin cells. Keep a travel-sized mist in your bag for quick touch-ups throughout the day.

    Remove Excess Oil Safely

    Remove Excess Oil Safely

    If your makeup caked because of sweat or oil production, adding more wet products might cause the base to break apart entirely. Instead, gently press oil blotting paper into your T-zone to lift the excess sebum without disturbing the foundation underneath. Avoid dragging the paper across your skin, which destroys the structural integrity of your cosmetics.

    Once the surface oils are safely absorbed, you can re-evaluate the texture of your skin. Often, simply removing the shiny, pooling oils will make the foundation look cohesive again. If a slightly dry texture remains after blotting, a very light misting of setting spray will lock everything back into place.

    Spot-Blend with Setting Spray

    If the foundation is settling into deep lines around your mouth or nose, lightly spray a dense foundation brush with a makeup setting spray. Buff the edges of the cakey area in tiny circular motions. This technique acts like an eraser, breaking down bunched-up pigments and redistributing them evenly across the skin surface.

    Using a brush coated in setting spray provides more structural control than a standard sponge. It allows you to target micro-creases without altering the makeup on your cheeks or forehead. This method works exceptionally well for high-coverage formulas that have already set to a completely matte finish.

    Prevention Strategies: How to Avoid Cakiness Next Time

    Prevention Strategies How to Avoid Cakiness Next Time

    Prep Your Complexion Correctly

    To avoid dealing with cakey foundation in the future, refine your prep and application techniques. Exfoliate regularly to remove dry, flaky patches, and always apply a generous layer of moisturizer suited to your specific skin type. If your skin is rough or unhydrated, any liquid coverage you apply will inevitably cling to surface texture.

    Crucially, ensure your skincare products absorb completely before applying primer or foundation. Waiting three to five minutes between your skincare and makeup steps prevents the different formulas from mixing into a thick, pasty film on your face. A smooth, hydrated canvas is the absolute baseline requirement for an airbrushed look.

    Match Your Formula Bases

    Check that your skincare, primer, and foundation have compatible bases to prevent chemical separation. If your moisturizer is water-based, use a water-based foundation; if it is silicone-based, use a silicone foundation. Mixing a water-based primer with a silicone-based foundation causes the products to repel each other, leading to immediate pilling and texture.

    You can easily check the ingredient list on your favorite bottles to determine their base. Silicone products typically feature ingredients ending in -cone or -siloxane near the top of the list, while water-based options list aqua as the primary component without heavy silicones following closely behind. Matching these systems keeps your makeup looking unified all day long.

    Apply Thin Layers Strategically

    Instead of applying one thick coat of product all over your face, use a single pump or less of foundation. Dot the fluid directly onto the center of your face where redness typically occurs, and blend outward toward your hairline. Apply more product only to specific areas where extra coverage is needed, such as over blemishes or dark spots.

    Building your coverage incrementally prevents the suffocating weight that triggers a heavy look. Modern foundations are highly pigmented, meaning a tiny amount goes a very long way when distributed correctly. By keeping the perimeter of your face light, your makeup looks like real skin.

    Diffuse Powder with Caution

    Diffuse Powder with Caution

    Too much powder emphasizes skin texture and robs your complexion of its natural dimension. Use a fluffy brush to dust translucent powder only on the areas that get shiny, such as the T-zone, rather than baking your entire face. This targeted setting method keeps your look fresh while controlling unwanted midday oils.

    If you accidentally apply too much powder, do not panic. You can melt the powdery texture away by using the damp sponge method mentioned earlier in this guide. Shifting from a heavy hand with powder to a minimalist approach will completely revolutionize how your makeup wears over long periods.

    Frequently Asked Questions

    1. Why does my makeup look texturized immediately after application?

    This issue typically happens when your skin is dehydrated or when your skincare products have not fully sunk into your skin before you apply your liquid foundation.

    2. Can I fix a heavy makeup look without washing it all off?

    Yes, you can easily save your look by pressing a damp makeup sponge infused with a hydrating facial mist over the patchy areas to melt the excess product away.

    3. How do I stop my concealer from creasing under my eyes?

    Apply your concealer in incredibly thin layers, blend it out thoroughly with a damp sponge, and set it immediately with a micro-amount of translucent powder.

    4. Does primer actually stop your foundation from looking cakey?

    A primer acts as a barrier that prevents your skin from absorbing the moisture out of your foundation, provided the primer base matches your foundation base perfectly.

    The Beautiful Breakdown: Your Flawless Finish Awaits

    Learning how to fix cakey foundation is a total game changer for your daily beauty routine. By embracing damp blending tools, matching your product ingredients, and applying makeup in light layers, you can say goodbye to heavy texture forever.

    Beautiful, skin-like coverage is completely achievable when you treat your skin with care and use the right melting techniques.  Remember to use safe skincare ingredients during pregnancy if you’re an expecting mother.

  • How to Fix Dried Mascara Quickly: 2-Minute Fixes!

    How to Fix Dried Mascara Quickly: 2-Minute Fixes!

    Every beauty lover knows the absolute panic of getting ready for a big night out, grabbing their favorite holy grail wand, and pulling out a flaky, crusty mess instead of a smooth liquid formula. 

    Dealing with a flaky tube right before an event is an absolute makeup nightmare, but you do not have to throw it in the trash just yet. Learning how to fix dried mascara quickly will save your look, your precious time, and your makeup budget all at once.

    Key Takeaways

    • Saline Restoration: Two drops of contact solution completely melt thick clumps.
    • Thermal Melting: Soaking a sealed tube in hot water liquefies hardened waxes.
    • Swirl Technique: Stop pumping the wand to keep drying air outside the bottle.
    • Six Month Limit: Toss old eye cosmetics to keep your vision safe from bacteria.
    • Formula Integrity: Avoid raw oils because they instantly smudge waterproof textures.

    Why This Lash Lifesaver Is Essential for Your Vanity Bag

    We have all been trapped in that frustrating moment where your eye makeup refuses to cooperate right before a major presentation or date night. Learning how to fix dried mascara quickly is the ultimate modern beauty boundary because it stops you from wasting money on luxury formulas that simply suffered from cold weather or temporary dryness. 

    It keeps your routine running smoothly while maintaining flawless, high-shine dramatic volume without an emergency run to the cosmetics store.

    The Safest Revival Methods for Your Favorite Wands

    Contact Lens or Saline Solution

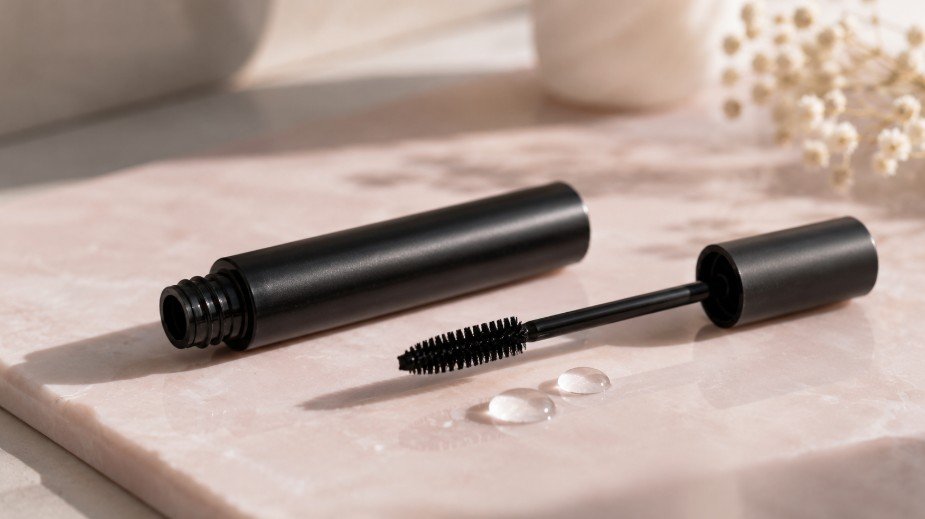
    This professional technique relies on a sterile, ophthalmologist-approved fluid that matches the natural pH balance of your eyes to break down dense cosmetic clumps. Open your product and place exactly one to two drops of sterile saline or contact lens solution directly into the tube. 

    Do not use plain tap water because introducing unsterile liquids can introduce dangerous bacterial elements into your makeup.

    How to Fix Cakey Foundation can also help you rescue your makeup look when texture, dryness, or product buildup starts affecting your final finish.

    Twist the wand back inside without pumping, then gently swirl the brush to mix everything well before applying.

    The Hot Water Trick

    The Hot Water Trick

    This alternative thermal method works perfectly when you are dealing with cold room temperatures that solidify structural cosmetic waxes. Take your completely closed tube of mascara and place it inside a coffee mug filled with hot, non-boiling water for about five minutes. 

    The external ambient heat gently softens the complex waxy formula, melting the dried product inside to restore a smooth, rich glide. Wipe the outside of the packaging completely dry before opening so no external moisture leaks into your fresh liquid pigment.

    Structural Maintenance: Keeping Your Makeup Formulas Fresh

    Stop Pumping the Bottle

    The way you use your beauty tools directly impacts how long the structural formulas stay smooth and fluid inside the packaging. Most people naturally pump their lash brushes straight up and down to collect pigment, but this pushes large amounts of ambient air deep into the base. 

    This bad habit dries out the liquid elements within a few weeks, turning a luxury product into a clumpy mess. Instead, gently roll or swirl the bristles along the inner walls to coat the brush evenly.

    Wipe the Threaded Cap

    Wipe the Threaded Cap

    Hardened product buildup around the opening prevents the container from forming a true, airtight seal when you close it up. Take a clean cotton pad soaked in micellar water and thoroughly clean the plastic ridges around the neck of the bottle every few weeks.

    Removing these old, crusty blocks allows the cap to tighten completely flush against the base, locking out drying elements. This quick storage adjustment extends the life of your product and keeps the formula creamy until the very last drop.

    Recognizing When a Formula Is Past Its Prime

    Recognizing When a Formula Is Past Its Prime

    Knowing when to fix a product vs when to throw it away is essential for protecting your delicate vision from common makeup pitfalls.

    Benefits of Bakuchiol vs Retinol can help you compare skincare actives with the same safety-first mindset before adding stronger formulas to your beauty routine.

    Every tube of lash product possesses a tiny graphic on the label known as the period-after-opening symbol, which looks like a tiny open jar. This symbol almost always displays a three-month or six-month limit, which serves as a strict expiration deadline for eye-safe cosmetics.

    Once this window closes, the preservatives inside the formula break down completely, meaning no amount of quick rehydration will make the product safe to apply to your face again.

    You must also learn to look for alternative warning signs like sudden changes in product aroma or application texture. If your cosmetic tube begins to smell sour, sharp, or strangely metallic, harmful bacteria have already begun to colonize inside the base. 

    Trying to revive a contaminated bottle can lead to uncomfortable eye redness, painful styes, or even serious corneal infections. When the formula hits these boundaries, skip the quick fixes and treat yourself to a brand-new tube instead.

    Frequently Asked Questions

    1. Can you rehydrate dried out mascara?

    Yes, you can safely rehydrate formulas by dropping sterile contact lens solution inside or heating the tube in a mug of warm water to liquefy the binding elements.

    2. How to liquify old mascara?

    To liquify old formulas safely, submerge the sealed container in hot water for five minutes to melt internal structural cosmetic waxes back into a smooth, even texture.

    3. How to revive crusty mascara?

    Revive crusty mascara by cleaning old pigment off the brush wand with micellar water and introducing two drops of sterile eye drops directly into the container.

    4. What can you put in mascara to make it wet again?

    You should only put sterile saline solution, contact lens fluid, or a specialized oil-free cosmetic mixing medium into the bottle to restore wetness without altering eye safety.

    Class Dismissed: Enjoy Your Flawless Clump-Free Volume

    Mastering how to fix dried mascara quickly keeps your daily beauty routine completely effortless while protecting your wallet from premature replacements. Always prioritize eye safety by sticking to sterile saline solution or using the warm water trick while avoiding the urge to pump air into the bottle.

    Keep your wands clean, seal your lids tightly, maintain flawless definitions, and enjoy beautifully separated, dramatic lashes every single day without clumping.

  • Glow Guide for Unveiling Benefits of Bakuchiol vs Retinol

    Glow Guide for Unveiling Benefits of Bakuchiol vs Retinol

    Staring into your vanity mirror every morning can feel like an internal negotiation when you spot those early fine lines creeping in. Finding a serum that smooths away texture without turning your complexion into a dry, flaking mess is the ultimate dream. Let us discover the life-changing cosmetic benefits of bakuchiol vs retinol to elevate your daily self-care ritual.

    Key Takeaways

    • Bakuchiol delivers identical gene expression for collagen production as conventional retinoids without any cellular skin irritation.
    • Retinol functions as the quick-acting dermatologist standard but carries heavy side effects like peeling and redness.
    • Photostable plant derivatives allow for safe morning and evening application without inducing harmful UV sensitivity.
    • Expectant mothers can confidently maintain an anti-aging glow since botanical alternatives pose no gestational safety risks.
    • Combining low doses of both ingredients builds a powerful synergy that optimizes total dermal rejuvenation.

    This Ultimate Ingredient Showdown Matters

    Diving into this modern skincare debate ensures you never waste money on beautiful bottles that cause unnecessary dermal stress.

    Are you exhausted from playing cosmetic roulette with your precious face only to wake up looking red and patchy? Navigating the exact benefits of bakuchiol vs retinol saves you from the painful trap of broken skin barriers while fast-tracking your journey to glass skin

    This ultimate guide breaks down the complex chemistry into simple terms so you can build a glowing, confident routine that aligns with your specific lifestyle needs.

    The Classic High-Potency Vitamin A Standard

    The Classic High-Potency Vitamin A Standard

    Examining traditional retinoids reveals why dermatologists have relied on this intense compound for decades to transform aging complexions.

    Retinol represents the absolute gold standard in clinical anti-aging science due to its unmatched speed and dramatic cellular renewal properties. It forces your skin cells to accelerate their natural turnover process, sweeping away dark spots and softening deep lines.

    This fast action leaves behind an exceptionally smooth surface that reflects light beautifully for that coveted youthful radiance.

    However, this rapid cellular overhaul comes with a notorious adjustment period that can thoroughly disrupt your moisture barrier. Users frequently experience intense flaking, dry patches, and uncomfortable stinging during the initial month of consistent application.

    The 1/2/3 Rule for Retinol helps you use retinol more slowly and safely when they want anti-aging results without overwhelming their skin barrier.

    Furthermore, this synthetic ingredient degrades quickly in sunlight and makes your skin highly sensitive to UV rays, restricting its application strictly to evening hours.

    Finally, traditional vitamin A derivatives carry strict medical restrictions that make them completely unsuitable for certain life stages. Pregnant and breastfeeding individuals must completely avoid retinoids due to potential systemic absorption concerns.

    This sudden restriction often leaves new mothers searching for a reliable alternative that keeps their complexion firm and clear throughout their journey.

    The Gentle Botanical Revolution Explored

    The Gentle Botanical Revolution Explored

    Stepping into the clean beauty spotlight is a remarkable plant-derived compound that redefines how we treat delicate skin types.

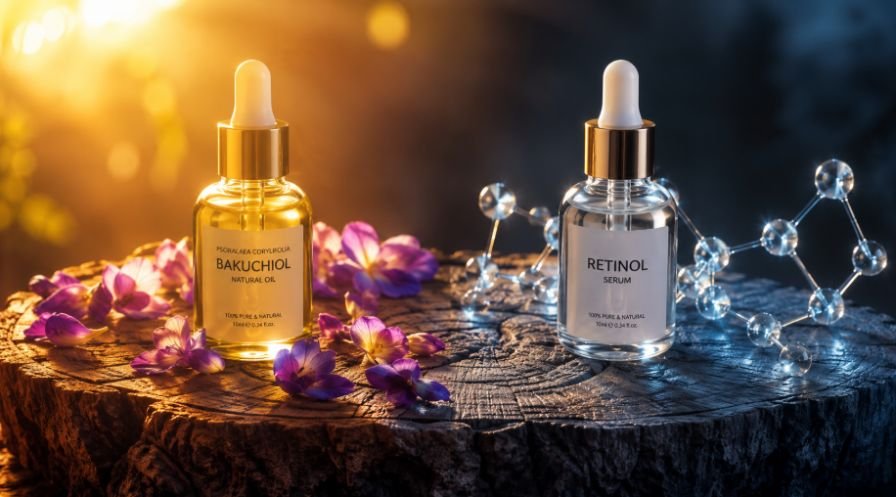
    Bakuchiol serves as a majestic plant-derived alternative extracted directly from the beautiful purple seeds of the ancient babchi plant. It functions through the exact same cellular pathways to stimulate natural collagen production and iron out wrinkles without causing any surface trauma.

    This makes it an absolute dream for anyone managing rosacea, eczema, or highly reactive skin conditions.

    A massive advantage of this botanical wonder is its incredible structural stability when exposed to natural ambient sunlight and environmental oxygen. It does not cause any increased photosensitivity, allowing you to comfortably apply it during both your morning and evening beauty routines.

    This double daily application delivers constant antioxidant defense, neutralizing free radicals before they can degrade your structural elasticity.

    Additionally, this clean botanical marvel boasts exceptional multitasking properties including powerful anti-inflammatory and natural antibacterial benefits. It actively targets acne-causing bacteria while simultaneously calming active, angry breakouts to restore structural balance.

    What Causes Strawberry Legs can help you understand how clogged follicles, irritation, and inflammation affect skin texture beyond the face.

    While generally celebrated as a safe option during pregnancy, top dermatologists still recommend a quick check with your primary healthcare provider first.

    How to Seamlessly Integrate the Benefits of Bakuchiol vs Retinol

    How to Seamlessly Integrate the Benefits of Bakuchiol vs Retinol

    Achieving a flawless complexion requires a precise, methodical application technique that respects your skin barrier while maximizing ingredient absorption.

    Begin your morning ritual by washing your face with a soothing, non-stripping cleanser, then patting the skin completely dry.

    Apply two to three drops of your selected serum smoothly across your face, neck, and chest area using gentle upward motions. If you are leveraging the gentle benefits of bakuchiol vs retinol, you can confidently apply your plant extract during the day under your makeup.

    Follow your treatment step with a rich, ceramide-infused moisturizer to seal in the active nutrients and reinforce your delicate lipid barrier. Conclude your daytime beauty routine by layering a generous amount of broad-spectrum mineral sunscreen with an SPF rating of thirty or higher.

    For the evening cycle, swap in your nighttime formula to let your cells regenerate undisturbed while you enjoy your beauty sleep.

    Frequently Asked Questions

    1. Is bakuchiol really as effective as retinol? 

    Clinical research confirms that understanding the benefits of bakuchiol vs retinol reveals identical efficacy in reducing fine lines, boosting elasticity, and fading hyperpigmentation over twelve weeks, but the plant extract accomplishes this without any painful stinging or flaking.

    2. What do Koreans use instead of retinol? 

    Korean skincare champions gentle botanical turn-over agents such as bakuchiol, soothing ginseng root, licorice root extract, and fermented snail mucin to achieve an ageless glass-skin appearance without triggering cellular inflammation or disrupting the skin barrier.

    3. What are the downsides of bakuchiol? 

    The primary downsides include a slower action time for severe cystic acne, fewer decades of long-term human testing compared to traditional retinoids, and a slight potential for localized allergic contact dermatitis from raw botanical elements.

    4. What should you not pair with bakuchiol? 

    While bakuchiol is highly stable and versatile, you should avoid pairing it with ultra-potent, unbuffered glycolic acid or TCA peels in the same layer to minimize the risk of accidental over-exfoliation and barrier stress.

    Class Dismissed: Time to Claim Your Ultimate Royal Glow

    Your journey to ageless skin does not have to be a painful battle filled with redness and peeling skin barriers. By embracing the proven benefits of bakuchiol vs retinol, you can craft an intentional skincare ritual that deeply respects your unique biology.

    Listen closely to your skin type, select the compound that honors your daily routine, and watch your natural radiance shine through effortlessly.

  • Bye Bye Dots! What Causes Strawberry Legs & How to Fix ‘Em 

    Bye Bye Dots! What Causes Strawberry Legs & How to Fix ‘Em 

    Staring down at those pesky dark dots on your shins right after a fresh shave can feel incredibly frustrating when you just want to rock your favorite summer shorts. Getting to the root of what causes strawberry legs is the first step toward reclaiming your skin’s natural, luminous glow. Let us dive into why these spots happen and how to gently banish them for good.

    Key Takeaways

    • Strawberry legs are caused by trapped sebum, dead skin, or irritated hair follicles.
    • Over-exfoliating damages your skin barrier, which actually worsens the dark spots.
    • Using a sharp, clean razor prevents trapped hairs and follicle inflammation.
    • Chemical exfoliants like salicylic acid clear pores much better than harsh scrubs.
    • Consistent hydration locks in moisture to keep your skin texture silky smooth.

    Why We Need to Talk About Smooth Skin

    Let us be completely real about why uncovering what causes strawberry legs is an absolute must for your beauty routine. Nobody wants to hide their legs in breezy sundress weather just because of a few tiny, harmless dots.

    Demystifying this common cosmetic annoyance helps you stop wasting money on viral products that do not work. It gives you the confidence to flaunt your radiant, silky skin all year round.

    Unpacking the Mystery of the Dots

    Understanding the underlying mechanics of your skin is essential before you can effectively treat it.

    Oxidized Pores and Sebum

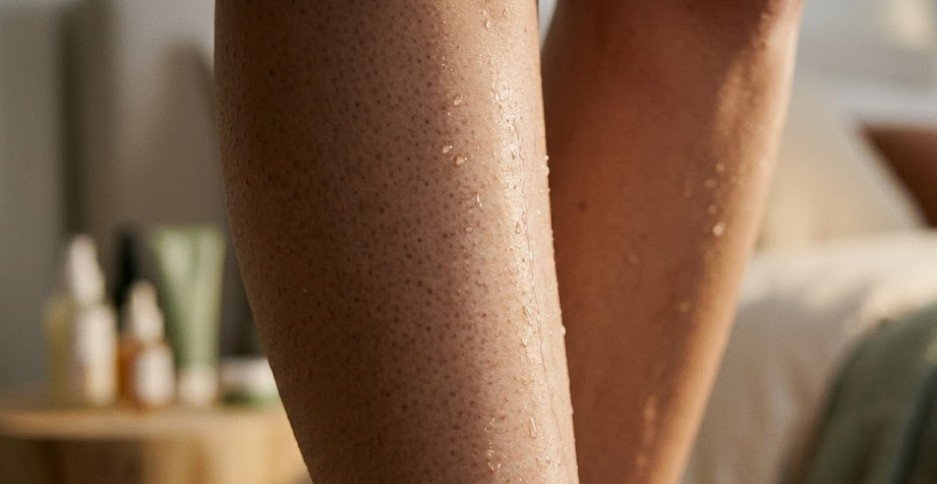
    Those tiny black dots look exactly like strawberry seeds because the oil and dead skin trapped inside your pores have been exposed to the air. 

    Just like a sliced apple turns brown on your kitchen counter, this mixture oxidizes and darkens when you shave away the top layer of skin. It is purely a cosmetic reaction, not a sign of poor hygiene or dirt.

    Keratosis Pilaris Complications

    Sometimes those little bumps are actually a buildup of a protective skin protein called keratin that plugs up your hair follicles. This condition makes the skin feel rough, sandpapery, and dry, which demands a completely different approach than normal clogged pores

    Treating it requires deep moisture rather than aggressive scrubbing to help soften the stubborn plugs naturally.

    Folliculitis and Inflammation

    When bacteria or fungi sneak into a damaged hair follicle, it triggers a mini inflammatory response that looks like a ring of tiny red or dark spots. 

    Shaving with an old razor or wearing tight workout leggings creates the perfect damp environment for this specific irritation to thrive. Keeping things clean and frictionless is your best defense against this type of breakout.

    The Secret Shaving Mistakes You Are Making

    Your daily shower routine might actually be the main culprit behind those stubborn dark marks on your skin.

    Using Dull Multi-Blade Razors

    Dragging a dull blade across your skin pulls at the hairs instead of cutting them cleanly, which forces the hair to snap back beneath the surface. 

    Multi-blade razors can also scrape away your top skin layer, causing immediate irritation and forcing the pore to swell shut over the hair. Switching to a fresh, sharp blade reduces the friction dramatically.

    Shaving on Dry Skin

    Shaving on Dry Skin

    Rushing through your shave with just water or a quick swipe of regular bar soap strips away your natural oils instantly. This lack of lubrication causes the razor to skip and micro-tear the skin barrier, leaving it completely vulnerable to clogging. 

    A rich, nourishing cream creates a protective cushion that allows the blade to glide effortlessly.

    Going Against the Grain

    Shaving upward against the natural direction of your hair growth might give you a temporary close shave, but it invites major trouble. 

    This technique twists the hair shaft, making it much more likely to curl inward and become a trapped, inflamed or infected ingrown hair. Gliding downward with the hair growth keeps the follicle perfectly happy and correctly aligned.

    Healing the Barrier From Over-Exfoliation

    Trying to scrub away the spots too aggressively often causes a vicious cycle of deeper irritation and darkness.

    How to Fix Cakey Foundation can also help you understand why smooth, hydrated skin texture matters before applying makeup over dry or irritated areas.

    Symptoms of a Damaged Barrier

    When you overdo the physical scrubs, your skin will start to feel tight, itchy, shiny without being oily, and intensely sensitive to your normal lotions. A broken moisture barrier cannot protect itself, which causes the skin to produce excess oil to compensate for the dryness.

    This flood of extra sebum fills your pores faster, making the dots look darker than before.

    The Power of Chemical Exfoliation

    The Power of Chemical Exfoliation

    Ditch the walnut scrubs and embrace the magic of liquid chemical exfoliants like salicylic acid or lactic acid to dissolve the glue holding dead cells together.

    Salicylic acid is oil-soluble, meaning it can actually dive deep inside the pore to clean out the oxidized gunk without scratching your skin.

    Lactic acid gently resurfaces the top layer while simultaneously drawing vital hydration into the tissue.

    Safe Skincare Ingredients During Pregnancy can help readers choose gentler exfoliating and moisturizing options when treating strawberry legs during pregnancy.

    Restorative Hydration Techniques

    Fixing your skin requires a heavy dose of barrier-repairing ingredients like ceramides, hyaluronic acid, and soothing colloidal oatmeal right after your shower. 

    Applying your creams while your skin is still damp locks in maximum moisture and seals the vulnerable outer layer. This plush hydration plumps up the skin, making pores appear significantly smaller and less noticeable.

    Causes Of Strawberry Legs Flawless Protocol

    Causes Of Strawberry Legs Flawless Protocol

    Transforming your skin texture requires a thoughtful, step-by-step methodology that prioritizes long-term health over quick, aggressive fixes.

    Start your routine by soaking in warm water for five minutes to naturally soften the hair shafts and open up your pores. Apply a generous layer of a gel-based shaving cream infused with aloe vera or shea butter to create a silky barrier. 

    Hold your single-blade safety razor at a gentle angle and shave smoothly in the direction of hair growth without applying heavy pressure. Rinse the area thoroughly with lukewarm water, pat dry gently with a clean towel, and immediately apply a liquid salicylic acid toner. 

    Finish the protocol by massaging a ceramide-rich lotion into your skin to rebuild the barrier and seal in that fresh, healthy radiance.

    Frequently Asked Questions

    1. How do you get rid of strawberry legs?

    You can easily clear away what causes strawberry legs by switching to a sharp single-blade razor, using chemical exfoliants like salicylic acid to clean deep inside the pores, and applying barrier-repairing ceramide moisturizers daily to keep the skin supple and smooth.

    2. What triggers strawberry legs?

    The dark dots are usually triggered by shaving with dull blades, dry shaving, a buildup of dead skin cells, naturally enlarged pores, or genetic conditions like Keratosis Pilaris which trap oil, bacteria, and keratin inside the hair follicles.

    3. How can you stop strawberry legs?

    You can successfully stop what causes strawberry legs by always shaving with a rich cream in the direction of hair growth, exfoliating gently two times a week with oil-soluble beta hydroxy acids, and keeping your skin deeply hydrated every single day.

    4. How to get rid of strawberry legs in 1 week?

    While total elimination takes time, you can reduce what causes strawberry legs in a week by dry brushing before showers, using a gentle lactic acid lotion, and deeply moisturizing damp skin to plump up the surrounding tissue instantly.

    Smooth Sailing to Flawless Skin

    Uncovering what causes strawberry legs allows you to stop guessing and start treating your skin with the targeted, loving care it truly deserves.

    By ditching harsh scrubs, upgrading your shaving habits, and focusing heavily on rebuilding your skin barrier, you will unlock the glowing, effortless results you have been dreaming of. Consistency is your best friend on this beautiful skincare journey.

  • Master Color Theory: How to Find Your Skin Undertone 

    Master Color Theory: How to Find Your Skin Undertone 

    Staring at rows of foundation at the beauty counter used to feel like a complete guessing game until this breakthrough happened. Discovering how to find your skin undertone completely transformed my beauty routine from a mismatched mess into a seamless canvas of pure, radiant confidence. 

    You have probably felt that exact frustration when a cosmetic shade looks perfect inside the glass bottle but turns bizarrely orange or ghostly gray the second it touches your face.

    The missing puzzle piece is never the depth of your complexion, but rather the quiet color temperature whispering just beneath the surface of your skin.

    Key Takeaways

    • Undertones remain completely permanent: Surface color changes with the seasons, but your underlying hue stays identical for life.
    • Look past basic categories: True color theory includes rare olive and peach variations, not just standard warm or cool.
    • Natural daylight is mandatory: Artificial lighting creates a false color cast that ruins your shade-matching accuracy.
    • Match to your jawline: Always blend your cosmetic swatches along the jaw rather than the center of your face.
    • Wrong hues cause sallow skin: Wearing the wrong tone creates an ashen or ghostly makeup mask appearance.

    Why Mastering This Beauty Lesson Matters

    Understanding your specific complexion profile saves your wallet from bad purchases and upgrades your everyday glamour instantly.

    Learning how to find your skin undertone acts as a permanent cheat code that prevents you from looking washed out, sallow, or ashy in your favorite cosmetics. It ensures every liquid foundation, concealer, lipstick, and eyeshadow you buy works in perfect harmony with your natural chemistry rather than fighting against it.

    The Core Blueprint of Complexion Architecture

    Understanding the physical structure of your skin color is the ultimate secret weapon for any beauty enthusiast looking to elevate their look.

    Your surface skin tone is simply the outer layer of melanin that changes when you tan in the summer or fade during the winter months. This outer shade easily categorizes your complexion into broad, visible groups like fair, light, medium, tan, deep, or rich.

    Beneath that shifting surface lies your permanent undertone, which is the static hue that never alters regardless of sun exposure of skin or skincare treatments.

    To determine your skin’s undertone, which is the hue beneath the surface that never changes, examine your bare wrist in natural light. Cool undertones show blue or purple veins, warm tones reveal green or olive veins, and neutral or olive tones feature a mix of colors or a subtle green cast.

    The Big Four Color Temperature Profiles

    Navigating the beauty universe requires a firm grasp on the distinct categories that define our underlying complexions.

    The Icily Radiant Cool Category

    People belonging to this group possess distinct hints of pink, rosy red, or soft bluish hues running quietly through their skin cells. This profile is incredibly vibrant but can struggle significantly with sudden flushing, surface redness, or high sensitivity to environmental changes.

    The Sun-Kissed Golden Warm Group

    This category shines beautifully with rich yellow, soft peachy, or deep golden shades that give off an effortless warmth. Your complexion thrives when surrounded by rich, sunny pigments that enhance the organic, glowing depth of your natural facial structure.

    The Balanced Neutral Equilibrium Spectrum

    Individuals in this specific category present an incredibly even, harmonious mix of both cool and warm hues without leaning heavily toward either side. This balance offers immense versatility in the beauty world, allowing you to sample an extensive range of cosmetic palettes without experiencing harsh clashing.

    The Elusive Olive Complexion Secret

    The Elusive Olive Complexion Secret

    This often-misunderstood profile features a distinct combination of neutral or warm base notes beautifully laced with unique green, ashen, or grayish hues. Classic beauty guides completely overlook this category, leaving many people feeling sallow when forced into traditional, overly yellow foundation bottles.

    Discovering Your Match with Simple Home Tests

    Discovering Your Match with Simple Home Tests

    Cracking the code to your unique underlying complexion requires a few simple, strategic tests performed right in the comfort of your home.

    Several simple, at-home tests can help confirm your specific undertone, and using them together provides the most accurate results for your cosmetic routine. Knowing how to find your skin undertone becomes incredibly easy once you look at how your face interacts with simple objects, colors, and the sun.

    The Classic Jewelry Comparison

    Look at which metal makes your skin look radiant and bright rather than dull or washed out against your reflection. Cool complexions look best in silver, platinum, or white gold, while warm tones find their perfect match in rich yellow gold.

    Neutral skin types are highly versatile and complement both metals equally well, giving you complete freedom at the jewelry counter.

    The Pristine White Paper Challenge

    Hold a piece of stark white copy paper or a pure white shirt next to your clean, makeup-free face in natural light. Cool profiles look rosy, pink, or slightly bluish in comparison, whereas warm skin casts a yellowish, peachy, or golden glow against the white paper.

    Neutral complexions look completely balanced, though you may find you look your absolute best in off-white or cream colors.

    The Organic Sun Reaction Observation

    Observe how your skin responds to sun exposure when you spend an afternoon outdoors without heavy sunblock. Cool skin types tend to burn or turn red very easily before, or instead of, tanning, which requires extra care. Warm tones tan easily and rarely burn, often developing a bronzed glow, while neutral tones tan easily but can occasionally burn.

    The Interactive Friend Comparison Method

    If you are still unsure, especially if you have deeper skin tones where veins can be difficult to read, compare bare, makeup-free celebrity-like face with a friend in natural daylight.

    Look for subtle, underlying hues like extra pinkness or green-gray tones when compared to someone with a similar skin depth. This collaborative approach removes the guesswork and makes identifying your unique undertone a fun, social beauty experiment.

    The Ultimate Smart Guide to Real Life Beauty Application

    Applying this newfound color knowledge transforms the way you shop for products and style your daily outfits.

    How to Fix Dried Mascara Quickly is another useful beauty guide for keeping your everyday makeup routine looking polished, especially when your favorite products start showing signs of drying out.

    Navigating the Liquid Foundation Aisle

    Navigating the Liquid Foundation Aisle

    When shopping for complexion products, look closely at the shade names and letters on the packaging, which usually feature letters like C, W, or N. Cool foundations will have pink or rosy bases, warm products lean toward golden yellow, and neutral formulas sit perfectly in the middle.

    Matching the product base to your underlying hue prevents that dreaded line around your jaw where your makeup completely ends.

    Selecting Your Perfect Signature Lipsticks

    Lipstick shades can make or break your makeup look depending on how well they align with your underlying color temperature.

    Cool profiles shine brightest in berry tones, plums, and blue-based red lipsticks that make teeth look incredibly white. Warm complexions look beautiful in terracotta, peach, coral, and orange-based reds that enhance the natural warmth of your smile.

    Building a Harmonious Wardrobe Palette

    Your wardrobe benefits immensely from this color theory, as certain fabric dyes will naturally make your skin pop while others make you look tired. Cool complexions stun in jewel tones like sapphire, emerald, and ruby, while warm complexions look stunning in earthy olive, mustard, and rust. 

    Neutral individuals can comfortably jump between both worlds, though muted pastels often look exceptionally elegant on their balanced skin.

    Urban Fashion Inspiration for Effortless Daily Style can help you use your best undertone-friendly colors in everyday outfits that still feel modern, easy, and wearable.

    Frequently Asked Questions

    1. What is the rarest skin tone color?

    A deep complexion combined with a starkly cool, blue undertone or a fair complexion featuring a true, green-dominant olive undertone are considered the rarest variations in global beauty color theory.

    2. Is there an app that finds your skin undertone?

    Yes, popular beauty retail applications use advanced camera scanning technology to analyze color metrics, though variance in phone screen calibration can occasionally skew the final results. Learn how to find your skin undertone using these tools with caution.

    3. How do I check my skin tone?

    Wash your face completely, wait fifteen minutes for surface redness to subside, and observe your jawline in natural sunlight using a hand mirror to accurately evaluate your outer surface depth.

    4. Can AI tell me my skin tone?

    Artificial intelligence color-matching tools can accurately analyze your skin tones, provided your upload features high-resolution imagery taken under balanced, indirect, natural daylight conditions without filters.

    Celebrate Your Perfect Cosmetic Alignment

    Unlocking the mystery of how to find your skin undertone is the ultimate turning point that elevates your personal beauty journey from standard guesswork to pure artistic mastery.

    Once you align your cosmetics with your natural biological color palette, your makeup ceases to look like a heavy layer of product and becomes a flawless, glowing extension of your authentic self.

  • Safe Skincare Ingredients During Pregnancy: Glow Safely!

    Safe Skincare Ingredients During Pregnancy: Glow Safely!

    Finding out you are expecting brings a wave of joy, but looking at your beauty vanity can trigger immediate panic. Upgrading your routine to protect your growing baby is a beautiful act of care, but navigating chemical labels feels like studying for a medical degree. 

    Splurging on a complex, ten-step routine is not necessary to keep your maternal glow intact. Making informed choices about safe skincare ingredients during pregnancy can easily clear up hormonal breakouts and calm unexpected sensitivity.

    Key Takeaways

    • Steer clear of high-risk synthetic retinoids, prescription acne treatments, and hydroquinone.
    • Embrace plant-based alternatives like bakuchiol to safely target fine lines and wrinkles.
    • Soothe hormonal acne and dark spots with azelaic and glycolic acids.
    • Switch from chemical sunscreens to mineral formulas utilizing zinc oxide.
    • Always consult your dermatologist or OB-GYN to verify individual product safety.

    Obsessing Over Pregnancy-Safe Skincare Ingredients Matters Now

    Let us be real: growing a human is a full-time job, but your changing hormones shouldn’t hold your face hostage. You deserve a stress-free pampering session without worrying if your night cream is secretly plotting a breakout coup. 

    Swapping out problematic formulas for safe skincare ingredients during pregnancy keeps you looking like a glowing goddess while ensuring your precious cargo stays entirely out of harm’s way on this wild nine-month ride.

    Decoding Your Changing Maternal Complexion

    Pregnancy hormones completely rewrite the rules of how your skin behaves over nine months. Surging estrogen and progesterone levels alter your sebum production, causing some women to experience severe dryness while others battle sudden, frustrating adult acne. 

    Your body also experiences a massive spike in melanocyte-stimulating hormone, which leaves you highly vulnerable to dark facial patches commonly called melasma. 

    Knowing that your skin barrier is hyper-reactive right now makes it essential to choose gentle, nourishing topicals that support your cellular health without causing systemic irritation.

    Heavyweight Performers for Brightening and Acne

    Managing hormonal flare-ups without relying on your usual chemical exfoliants requires a strategic product shift.

    Heavyweight Performers for Brightening and Acne

    The Magic of Azelaic Acid

    Calming angry red blemishes and stubborn hyperpigmentation becomes much easier when you introduce this multi-tasking dicarboxylic acid. Dermatologists highly recommend azelaic acid because it gently minimizes acne-causing bacteria while calming systemic inflammation across your cheeks and jawline. 

    It serves as a spectacular, risk-free substitute for hydroquinone by safely interrupting the pigment production process to fade dark spots without entering your bloodstream.

    Embracing Gentle Alpha Hydroxy Acids

    Exfoliating away dead skin cells remains crucial to keeping your pregnancy complexion vibrant and clear. While high-dose beta hydroxy acids are best left on the shelf, alpha hydroxy acids like glycolic acid and lactic acid are considered low-risk choices for expectant mothers. 

    Sticking to over-the-counter concentrations under 10% helps ensure that these fruit-derived acids remain entirely superficial, giving you an enviable radiance without irritating deep tissue.

    Niacinamide and Vitamin C Synergy

    Brightening a dull complexion requires a powerful duo of antioxidants that work beautifully alongside your daily hydration steps. Topical vitamin C acts as a brilliant shield against environmental free radicals, helping prevent dark patches from deepening whenever you step outside. 

    Layering it with niacinamide, also known as vitamin B3, strengthens your delicate moisture barrier, regulates excess oil production, and noticeably shrinks expanded pores.

    Safe Skincare Ingredients During Pregnancy: Your Three-Step Daily Ritual

    Transforming your daily beauty routine into a safe ritual requires simple, deliberate product adjustments.

    Safe Skincare Ingredients During Pregnancy Your Three-Step Daily Ritual

    Stepping into your morning routine should always start with a sulfate-free, low-foaming gel cleanser to purify your pores without stripping away precious natural lipids. After patting your face dry with a clean towel, gently press a dedicated vitamin C serum into your skin to activate antioxidant protection and promote collagen synthesis

    Finish your morning regimen by applying a generous layer of broad-spectrum mineral sunscreen containing non-nano zinc oxide to block harmful ultraviolet rays.

    Winding down in the evening provides the perfect opportunity to repair environmental damage and deeply soothe your reactive skin barrier. Begin with a nourishing oat cleansing balm to completely dissolve away stubborn mineral SPF, sweat, and daily pollutants. 

    Follow up by applying a targeted treatment like a 10% azelaic acid serum or a plant-derived bakuchiol cream to stimulate cellular turnover overnight. Lock everything in with a rich, fragrance-free ceramide moisturizer packed with hyaluronic acid to keep your skin plump and hydrated until morning.

    Defending Sensitive Complexions from Harmful Topicals

    Protecting your developing baby means completely eliminating specific high-risk chemicals from your bathroom counter.

    Defending Sensitive Complexions from Harmful Topicals

    Say Goodbye to Retinoids

    Prescription formulas like tretinoin and over-the-counter retinol must be completely discontinued the moment you decide to conceive. High oral doses of vitamin A derivatives are directly linked to serious congenital developmental issues, making topical versions an unnecessary risk for your beauty routine. 

    Swapping these out for bakuchiol delivers almost identical smoothing benefits for fine lines without triggering cellular toxicity or deep skin irritation.

    The Dangers of Chemical Sunscreens

    Traditional chemical UV filters can cause internal disruption that you definitely want to avoid while expecting. Ingredients like oxybenzone and avobenzone easily absorb through your skin barrier, with clinical studies showing they linger in maternal blood streams and breast milk.

    Transitioning to physical blockers like titanium dioxide ensures your sun defense sits safely on top of your skin, deflecting heat without absorbing internally.

    Frequently Asked Questions

    1. What skincare ingredients should I avoid in pregnancy?

    You must completely avoid topical retinoids, hydroquinone, chemical sunscreens like oxybenzone, and high-dose salicylic acid treatments. These specific compounds carry high systemic absorption risks that can negatively impact fetal development.

    2. What ingredients are safe during pregnancy for skin?

    Dermatologists recommend safe skincare ingredients during pregnancy such as azelaic acid, low-dose glycolic acid, vitamin C, niacinamide, bakuchiol, and mineral blockers like zinc oxide. These provide exceptional results without risking safety.

    3. Is it okay to take Lexapro while pregnant?

    Decisions regarding prescription antidepressants require a careful medical consultation directly with your primary OB-GYN. They will thoroughly analyze your mental health requirements against any potential low risks to your baby.

    4. What skin care products are safe during pregnancy?

    Gentle cleansers, hyaluronic acid serums, ceramide moisturizers, and physical mineral sunscreens are highly recommended for daily use. Always check your formulas using tools like the ScanSkinAI Ingredient Checker to stay safe.

    Rocking Your Maternal Glow with Safe Skincare Ingredients 

    Curating a protective beauty routine does not mean sacrificing your signature glow or dealing with uncontrolled breakouts. Focusing on clinically validated, non-toxic alternatives like azelaic acid and mineral sunscreens allows you to cultivate gorgeous skin while keeping your baby perfectly safe. 

    Lean into this special chapter of your life with confidence, knowing your intentional choices are supporting your long-term maternal wellness.

  • Say Bye to Chaos! With Ultimate Perimenopause Skin Care Guide

    Say Bye to Chaos! With Ultimate Perimenopause Skin Care Guide

    Staring into the bathroom mirror only to discover a rogue cystic blemish sitting right on top of a fresh cluster of fine lines is the quintessential midlife surprise. Finding a balancing routine feels nearly impossible when your hormones are fluctuating more than the stock market. While leaving your face feeling like a desert one day and a slick oil slick the next. 

    Navigating skin care for perimenopause requires throwing out the old anti-aging playbook. And adopting a gentle, deeply strategic approach that honors your changing cellular biology.

    Decoding Your Changing Midlife Complexion

    Understanding the underlying biological transition happening beneath your dermal layer is the first step to reclaiming your radiant glow.

    As early as your late 30s or mid-40s, ovarian estrogen production begins its erratic descent, throwing off the delicate equilibrium of your skin barrier. Estrogen is the unsung hero of your dermal matrix, acting as a biological engine that prompts cells to produce moisture-binding hyaluronic acid, youthful collagen fibers, and structural elastin. When these hormone levels drop, your skin loses its structural scaffolding, which directly translates into rapid volume loss, increased trans-epidermal water loss, and a compromised defense system.

    Progesterone levels also begin to tank during this transitional phase, which can leave testosterone temporarily running the show uninhibited. This specific hormonal imbalance is the exact reason why you might suddenly experience painful, deep jawline breakouts reminiscent of your teenage years, coupled with paper-thin dryness everywhere else. 

    Recognizing that your skin is not failing but is simply navigating a profound internal shift allows you to choose ingredients that soothe rather than punish your complexion.

    Master the Art of Over-the-Counter Layering

    Crafting a sophisticated daily routine with readily accessible beauty products can easily rival the results of high-end prescription programs without the clinical irritation.

    Master the Art of Over-the-Counter Layering

    The Gentle Morning Shield

    Protecting your shifting skin structure from environmental stressors requires a strategic blend of hydration and defense.

    Always start your day by skipping harsh, sudsy cleansers that strip your natural oils, opting instead for a gentle cream face wash that rinses away impurities while leaving the moisture barrier intact. Immediately following your rinse, apply a generous layer of a multi-weight hyaluronic acid serum to damp skin to pull water deep into the parched epidermal layers. 

    Layer an antioxidant cocktail containing stabilized vitamin C and niacinamide directly on top to fade hyperpigmentation, boost natural collagen synthesis, and uniformize uneven skin tone

    Finish your morning ritual by sealing in that precious hydration with a lipid-rich ceramide cream and a generous application of broad-spectrum mineral sunscreen to prevent further cellular thinning.

    The Midnight Repair Ritual

    Harnessing your body’s natural nighttime circadian rhythm allows your skin to deeply repair, regenerate, and restock depleted nutrient reservoirs.

    Nighttime is when the real transformation happens, making your evening product sequence the absolute cornerstone of your midlife beauty strategy. Begin with a nourishing cleansing balm to dissolve the day’s debris without disrupting the delicate pH balance of your skin surface. 

    Introduce a gentle, low-dose over-the-counter retinol or a plant-derived bakuchiol serum three nights a week to safely accelerate cell turnover and smooth fine lines without inducing flakiness. 

    On alternating nights, layer a luxurious treatment rich in plant-based phytoestrogens, like genistein or red clover extract, which bind to empty estrogen receptors to visibly restore bounce and density.

    Conclude the night with an ultra-thick barrier cream packed with fatty acids and squalane to mimic the protective sebum your skin no longer produces on its own. This helps prevent cakey foundation. 

    Key Steps for Strategic Dermal Reclamation

    Implementing a step-by-step sequence optimized for skin care for perimenopause ensures you treat changing tissue with maximum care and scientific precision.

    Hydrating Cleanser Upgrade

    Switch to a non-stripping, milky or gel cleanser to protect your existing moisture reservoirs.

    Your cleansing step sets the tone for your entire routine, meaning harsh soaps or foaming formulas must be retired immediately. These overly aggressive suds deplete your skin’s natural moisture barrier, leaving your face feeling tight, inflamed, and highly vulnerable. 

    Transitioning to a lipid-replenishing milk or cream cleanser washes away daily impurities while actively depositing essential hydration back into the delicate epidermis.

    Antioxidants and Peptides Layering

    Antioxidants and Peptides Layering

    Incorporate targeted morning serums to actively brighten age spots and protect the skin from environmental stressors. Layering a specialized vitamin C serum under your moisturizer helps neutralize the free radicals that accelerate structural aging. 

    This morning step provides a powerful shield against dark spots while simultaneously waking up a dull, tired complexion. Integrating structural peptides alongside your antioxidants signals your skin to produce more collagen, effectively reinforcing elasticity and firmness from within.

    Barrier Repair Fundamentals

    Incorporate rich moisturizers that contain hyaluronic acid, glycerin, and ceramides to lock in vital cellular moisture. The sudden drop in sebum production requires a conscious shift toward dense, emollient creams that act as a surrogate protective shield.

    These nourishing ingredients trap critical moisture within the surface layers, instantly relieving the severe dryness and sensitivity common during hormonal changes

    By reinforcing the cellular cement between your skin cells, you prevent environmental irritants from triggering unwanted redness.

    Cell Turnover Acceleration

    Use a retinol or prescription-strength tretinoin at night to boost cell turnover and stimulate collagen production. Slower cellular shedding can leave your skin looking slightly textured. Making a vitamin A derivative your absolute best friend for evening repair.

    If your skin becomes too reactive or flaky with traditional formulas, consider a gentler retinaldehyde or a plant-based retinol alternative. Consistent application ensures fresh cells rise to the surface, resulting in a noticeably smoother and firmer texture over time.

    Targeted Topical Treatments

    Products formulated specifically for menopausal skin can visibly improve skin elasticity, density, and overall thickness.

    Integrating specialized topical formulations containing estriol creams or phytoestrogens can directly target the root cause of structural midlife thinning. These unique botanical molecules mimic the positive effects of estrogen, helping to plump up deflated areas around the eyes, cheeks, and jawline. 

    This step represents the ultimate modern boundary where advanced beauty science perfectly intersects with natural hormonal support.

    Daily SPF Protection

    Daily SPF Protection

    Apply a broad-spectrum SPF 30 or higher every single day to defend against newly sensitive sun damage. Because natural estrogen loss causes the skin to thin, your face is much more susceptible to stubborn sun damage and deep dark spots.

    Opting for mineral sunscreens featuring zinc oxide provides an extra layer of soothing, anti-inflammatory protection for newly reactive skin types. Never skip this final morning step, as UV defense is the absolute foundation of maintaining your hard-earned brightness.

    Where to Shop and Learn More

    Finding the perfect formulations designed specifically for hormone-related skin changes is incredibly easy with these trusted resources. For highly-rated, targeted product lines, check out the Vichy Menopausal Skin Collection or explore the No7 Menopause Skincare line for excellent over-the-counter options. 

    For expert dermatologist tips and insights on navigating your routine during this transition, read the American Academy of Dermatology Guide to ensure your approach remains perfectly aligned with clinical safety. Combining these reliable brands with expert advice gives you an undeniable advantage in mastering midlife beauty.

    Frequently Asked Questions

    1. What is the best skincare for perimenopause?

    The best routine centers on intense hydration and barrier repair using over-the-counter products containing ceramides, hyaluronic acid, niacinamide, and gentle collagen-stimulators like bakuchiol or low-dose retinols to safely restore bounce without irritating thinning skin.

    2. How do I take care of my skin during perimenopause?

    Prioritize washing with non-foaming cream cleansers, layering water-binding humectants under rich lipid creams, and introducing topical phytoestrogens to stabilize unpredictable hormonal fluctuations while avoiding harsh, stripping exfoliants.

    3. Can perimenopause trigger fibromyalgia?

    While hormone fluctuations do not directly cause fibromyalgia, the dramatic drop in estrogen can significantly amplify pain sensitivity, worsen sleep disturbances, and heighten systemic nervous system vulnerability during the midlife transition.

    4. Can perimenopause cause high cholesterol?

    Yes, declining estrogen levels directly alter lipid metabolism, which frequently causes a noticeable rise in low-density lipoprotein, also known as bad cholesterol, and total cholesterol during this physiological transition.

    Unlocking Your Most Luminous Midlife Chapter Yet

    Navigating your skin care for perimenopause journey doesn’t have to feel like an uphill battle against your own biology.  Once you understand the unique rules of engagement. By substituting aggressive anti-aging treatments with intentional, deeply nourishing over-the-counter barrier repair and strategic ingredient layering. You easily bypass the clinical pitfalls of dry, irritated skin. 

    Embrace this empowering transitional phase as the perfect opportunity to upgrade your beauty self-care ritual. Resulting in a resilient, deeply hydrated, and undeniably luminous complexion that glows from the inside out.